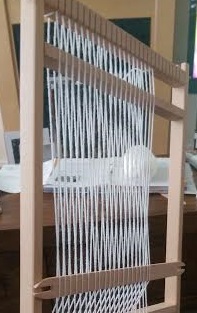
It took me a while to understand how exactly to set up the loom. I bough an A3 (ish) sized loom from Amazon a few weeks ago so tried using the instructions that came with it and the guidance in the brief and eventually managed to get it set up correctly. It’s rather difficult for a first time user but the process, once done a few times, is rather simple to remember and I gained confidence rather quickly doing this.
For my first sample of weaved stitches, I set up my loom how I was asked in the brief, wrapping yarn around the frame to make a total of 40 warped threads. I must admit, I found this a little difficult to handle at first as my loom had notches in the top, I had to go around the whole frame which is probably about and inch deep so there was a lot of space between the top warped threads and the bottom which made my tension a little funny. I did manage to get past this but it did cause a few issues in regards to how to position the loom as on a flat surface it was difficult to pick up the back warp. I did receive a few shuttles and heddle (although I didn’t learn what this was until later) in the pack though so decided to put one through to hold them together which made it a little easier.
I started with the standard weave technique for a few rows, then alternated the colours row by row. I also tried all the techniques it suggested: Curved wefts, Soumak and Ghiordes Knots. I used grey, pink and white to do this as the colours contrasted well so I could see from up close and from a distance the effects of the difference between techniques.


I was really please with how this had turned out. I do wish that the Ghiordes Knots had been introduced after the standard technique as I felt they covered some of my previous work and if we had been told to do them sooner, I could have incorporated them better. I really enjoyed working with these techniques. I find the soumak a little tricky as you have to be very aware of the tension so as not to mess up the warp but with a bit more practice and using different materials, I found a soon got the hang of it.
I was then asked to play around with different types of yarns.
This was a very fun exercise. I found that my materials I had available were a little limited (I’m currently moving out of my house and had to get rid of a lot of things in the process as our new home has a fraction of the space available than I did have) but I really enjoyed scraping together what I had an having a play around with this.
I think I was a little more free with this one. I knew the techniques and was able to have fun with it instead of concentrating too much. I used a variety of mediums for this:
The first few rows were using a ribbon yarn I found at a charity shop, the next few rows were using some plastic tubing, then I used some scraps of fabric and found some gold elastic to work with. I used the basic weaving technique for this so far as I was interested to see how the different mediums looked in comparison to each other. I then moved on to using plastic bags, having used them before I decided to try the soumak technique which I feel looks very good although found the results a little on the large side for the piece. I then moved on to use some lace that I had stashed away, a little more soumak technique with a 100% acrylic wool then finished with some chunky multi-tonal yarn I found.

I really love this sample. I love how, even using predominantly the same stitch through out, the different mediums give it a very interesting, textural feel. I’d like to create more samples using different mediums and techniques.
